MongoDB: Cloud Atlas Setup
Setting up MongoDB Cloud Atlas (for new users)
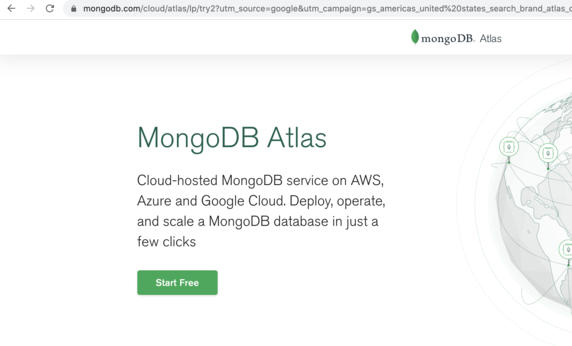
The current recommended MongoDB installation for CS48 is MongoDB Cloud Atlas.
The instructions in this article cover how to set up a new free account, up to the step where you get a MongoDB URI connection string.
Step 1: Create free account
Navigate to https://mongodb.com/cloud/atlas and click the “Start Free” button.
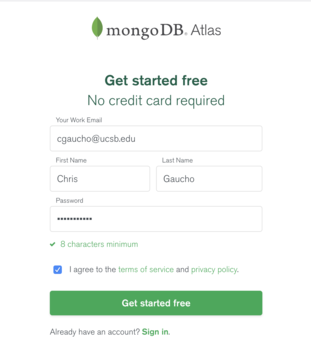
Step 2: Fill out the form
Fill in the form. We encourage you to use your @ucsb.edu account.
Step 3: Choose the Free Plan
The next page asks you to choose from among various plans. Naturally, you should choose the free plan, so click the “Create a cluster” button in that column.


Step 4: Choose a cloud provider
MongoDB Cloud Atlas runs, under the hood, on other cloud providers: Amazon, Google, and Microsoft’s platforms. The default is Amazon, and you need to choose either US East, or US West.
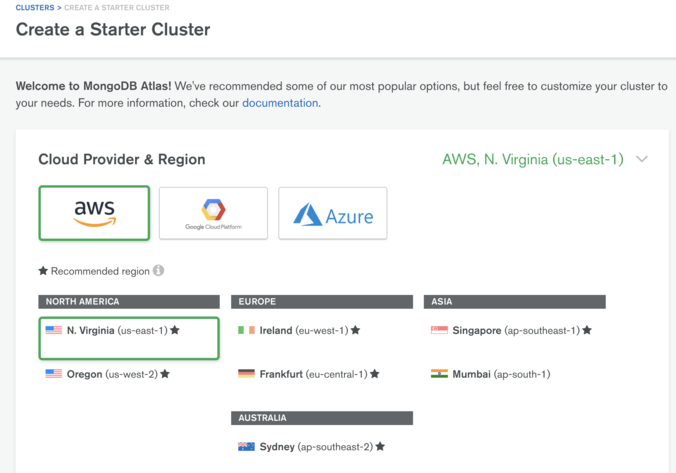
If you are located in California, there may be some marginal performance benefit to choosing US West,
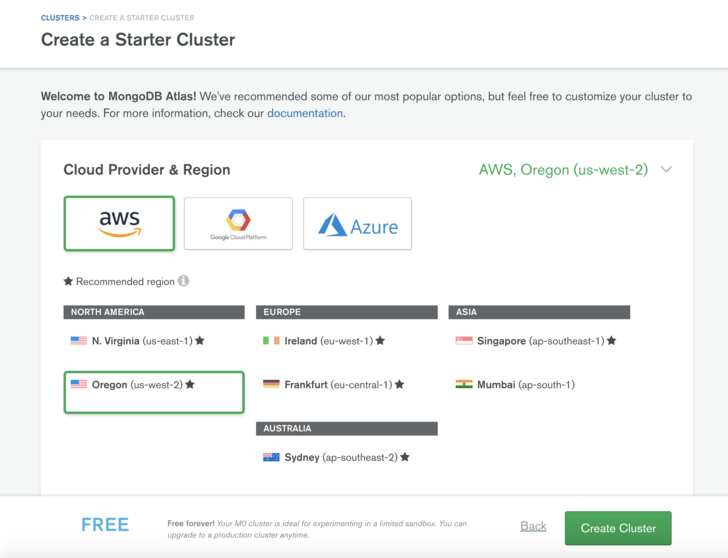
Click the “Create Cluster” button. This will launch Cluster Creation, described in the next step.
Step 5: Cluster Creation
At this point, there is about a 3 minute wait while your cluster is being created. The screen will look like this, with a blue progress bar at the top, and a note that your cluster is being created in the center of the screen.
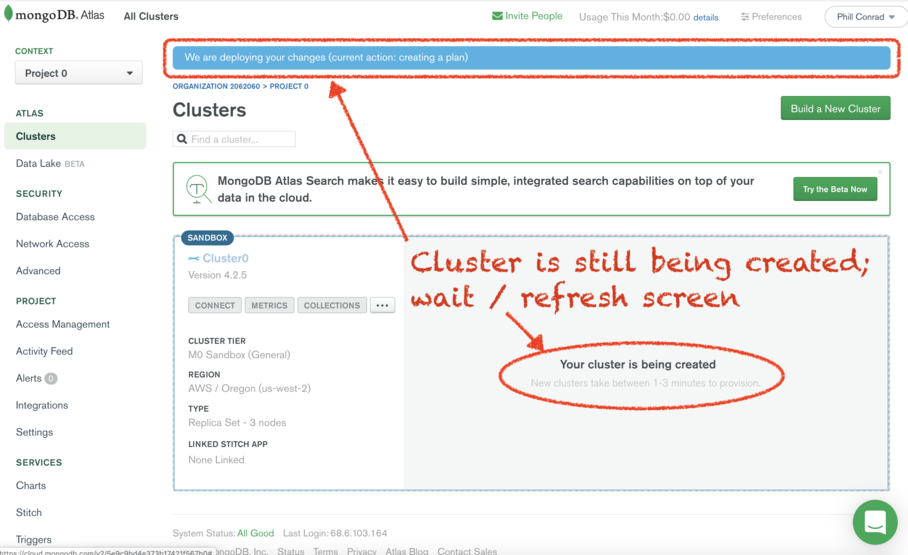
You can wait, or periodically refresh your page, until it looks like this. This is your indication that cluster creation is finished:
At this point you are ready to click the “Connect” button as shown below.
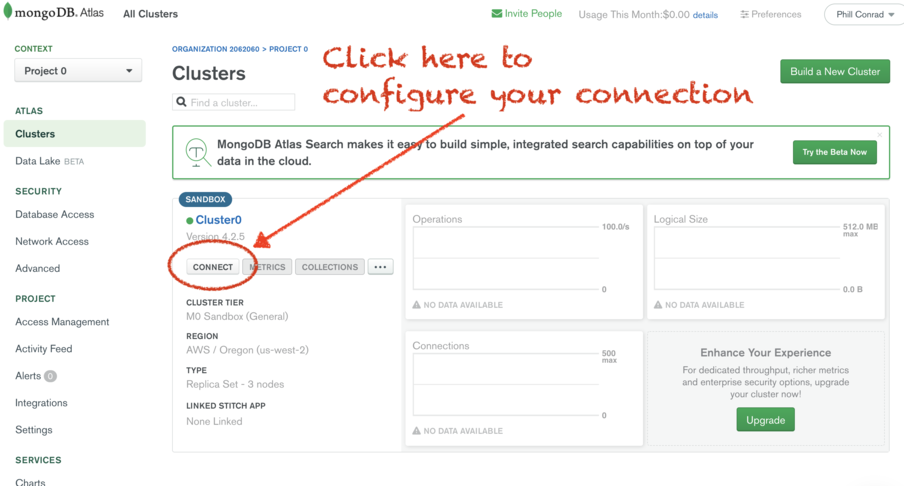
That should take you to this screen, which will be described in the next step.
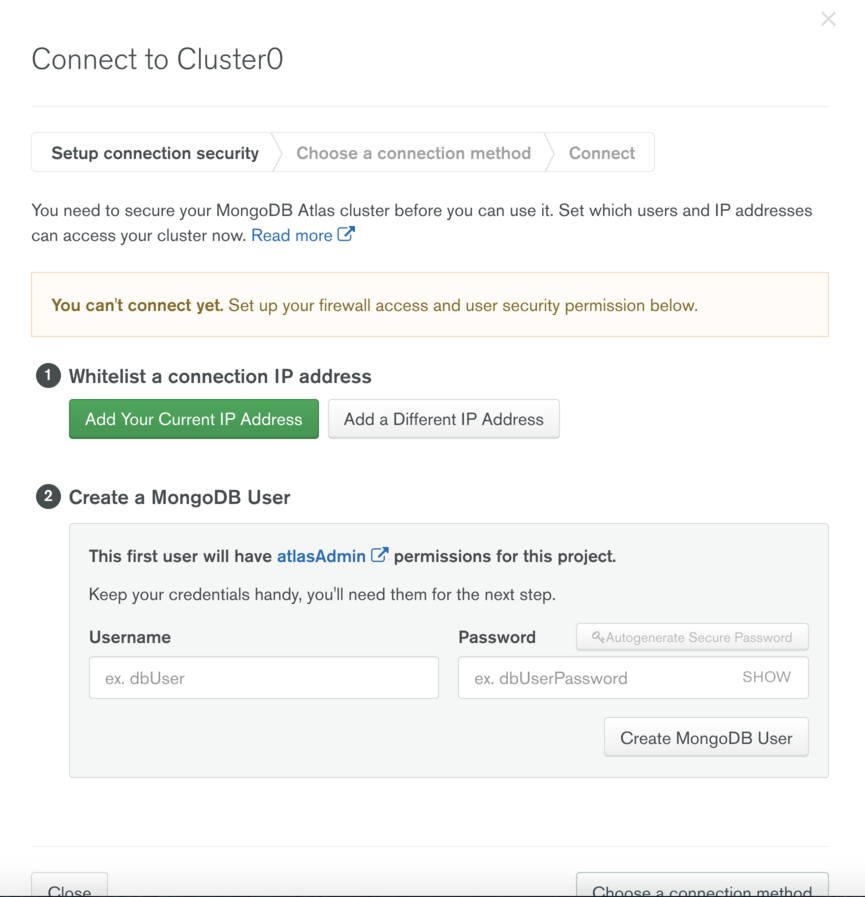
Step 6: Whitelist Current IP Address
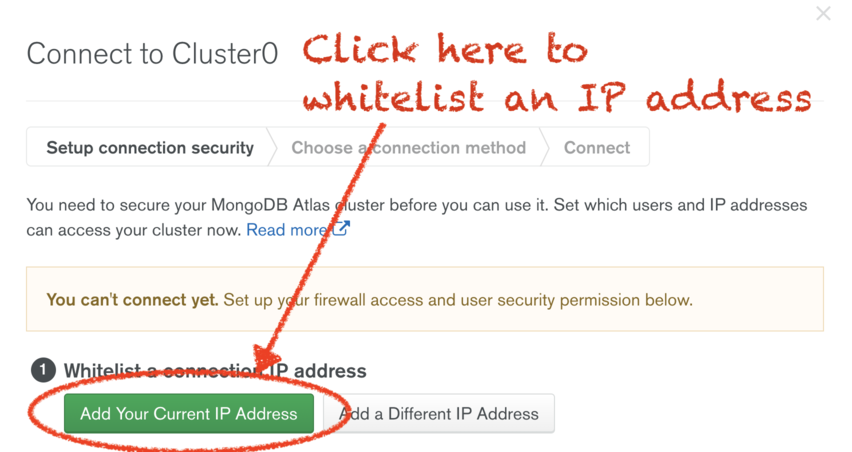
When you click on the “Add Your Current IP Address” button, you’ll be deposited at this screen. Add a description of the machine and internet connection you are currently using, and click “Add IP Address”.
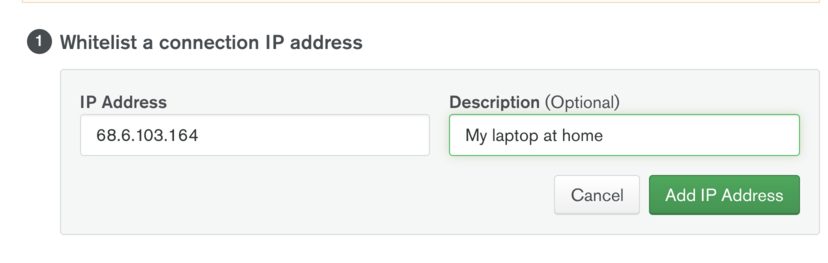
Note that this will only whitelist the IP address of the computer on which you are running the web browser.
This should allow you to connect to the MongoDB database from your
application when running on localhost on that same computer.
It will not however, allow access from:
- cloud platforms such as now.sh
- your same laptop, if it changes IP address (e.g. if you move from one network to another, or if your ISP changes your apparent public IP address from time-to-time).
Therefore, you may need to return to this screen later to whitelist additional IP addresses.
Step 8: Whitelist the Entire Internet
## Why are we whitelisting the entire internet?
We need to be able to access our MongoDB not only from our localhost, but from the cloud providers where we deploy our app (e.g. now.sh and/or Heroku).
Those services run on their own IP addresses, so ideally, we would need to whitelist those as well, or failing that, some “address ranges” used by those services.
Unfortunately, as explained in the linked articles, this is not very feasible on the free tiers of our cloud providers:
- On Heroku, for the free tier, the best you can do is to whitelist an entire region of Amazon Web Services. That’s pretty wide open, and the extra security gained by whitelisting “only” vs. the entire internet, may not be worth the hassle. https://help.heroku.com/JS13Y78I/i-need-to-whitelist-heroku-dynos-what-are-ip-address-ranges-in-use-at-heroku. There are solutions for the more expensive tiers of Heroku; if/when your CS48 project turns into a commercial success that you can monetize, you could migrate to one of those.
- As for now.sh, they basically just say: “no” https://github.com/zeit/now/issues/3723
Accordingly, although it may not be the “best practice” in terms of security, the easiest way to proceed is to whitelist the “entire internet”.
## So why we did we whitelist my own IP address?
I wanted you to be familiar with the idea of whitelisting only a single IP address.
At some point, you may find that useful if you are doing some testing, and/or if you are configuring other applications for your own use.
## How do we whitelist the entire internet?
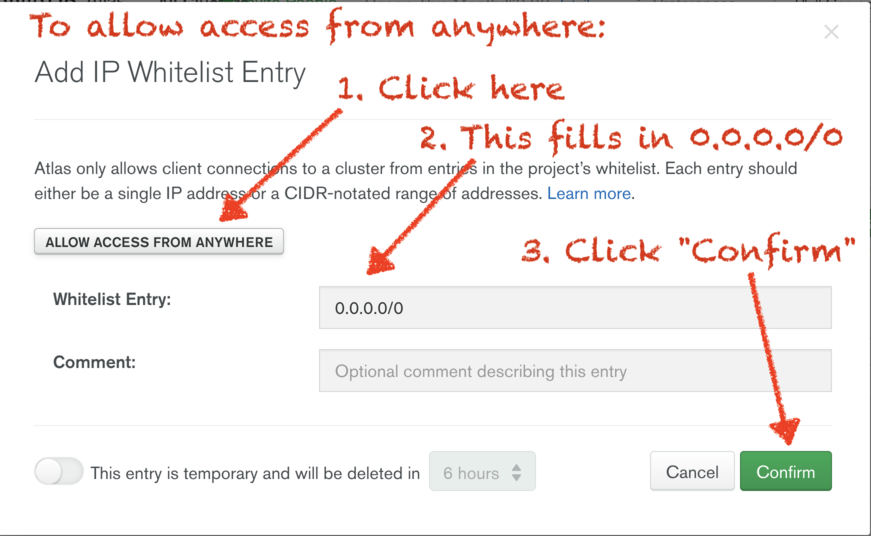
To whitelist the entire internet for MongoDB, proceed as follows:
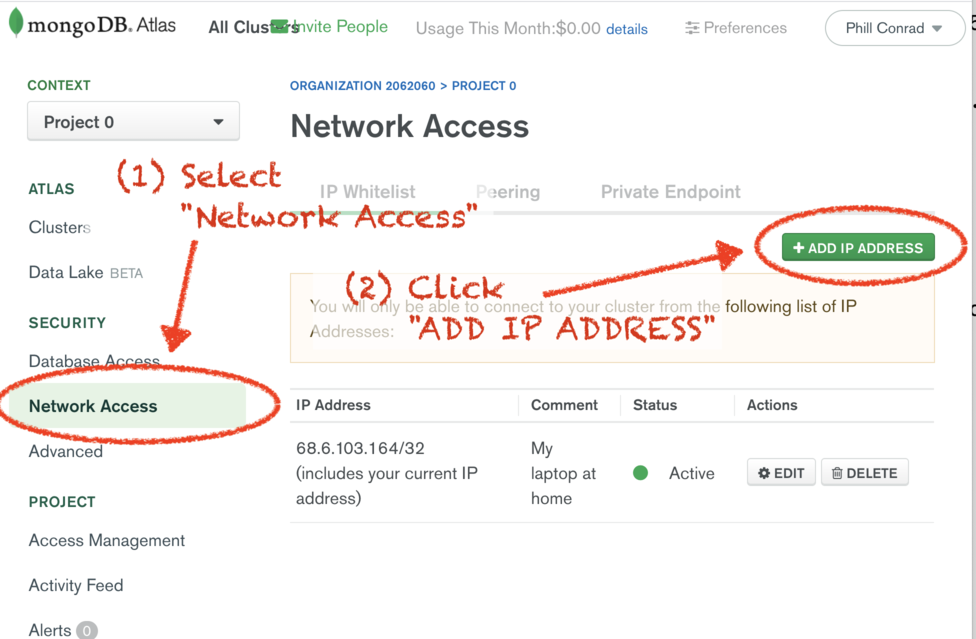
Access the menu item on the left for “Network Access”, and then click the button to “ADD IP ADDRESS”.
In the screen that comes up, there is a button for
“Allow Access from Anywhere”. This automatically enters the
address block 0.0.0.0/0, which is the standard notation for
“All IPv4 addresses”, i.e. the entire Internet.
Click “Confirm” and then your MongoDB database will be accessible from anywhere.
Step 8: Create a MongoDB User
In this step, you will create a MongoDB user.
- Note that this is not the same as your user account for mongodb.com
- In particular, it is usually NOT tied to an individual, e.g.
cgaucho - Instead, this is typically a “username” such as
dbuser- It is sometimes the case that we create multiple usernames with different access levels, e.g.
dbadmin,dbreadwriteand/ordbread.
- It is sometimes the case that we create multiple usernames with different access levels, e.g.
- This user gets created along with a password; that username/password comnb
-
This username/password pair will get hardcoded in the configuration files (e.g.
.envfor a node app, or a.propertiesfile for a Spring app), typically embedded in a MongoDB URI such as this one (which contains fake credentials):mongodb+srv://adminuser:2w9zmu3pwN6QlPSX@cluster0-3b7ap.mongodb.net/test?retryWrites=true&w=majority
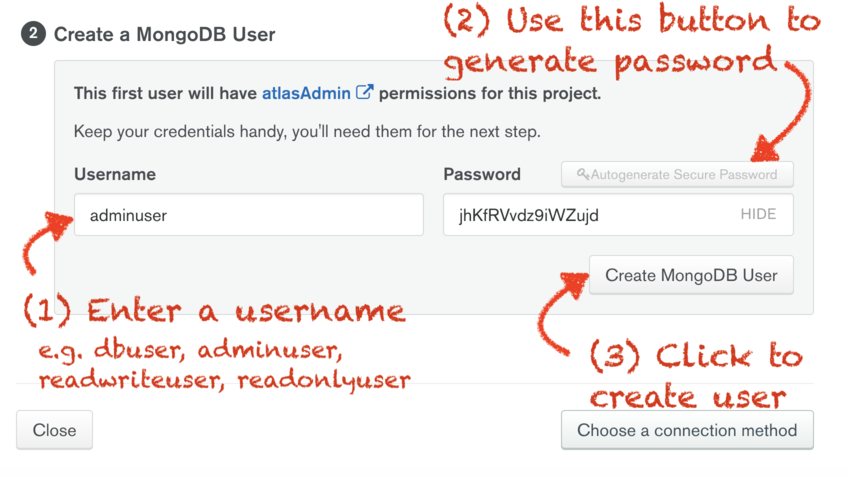
Enter a name for the user you are creating. If it is a user that has
admin privileges, it can be helpful to document this by called it adminuser, but the
name is really arbitrary.
To generate the password, it is strongly recommended to use the “Autogenerate Secure Password” button. Note that you cannot access this password later. However, you can change it without having to regenerate the user. Since we are not ready to put that password anywhere yet, I suggest generating a random password, and coming back later to change it when you are ready to copy/paste it into your configuration file (at a later step.)
Click “Create MongoDB User” to proceed.
That should take you to this screen, where you can click the green “Choose a Connection Method” to access the next step.

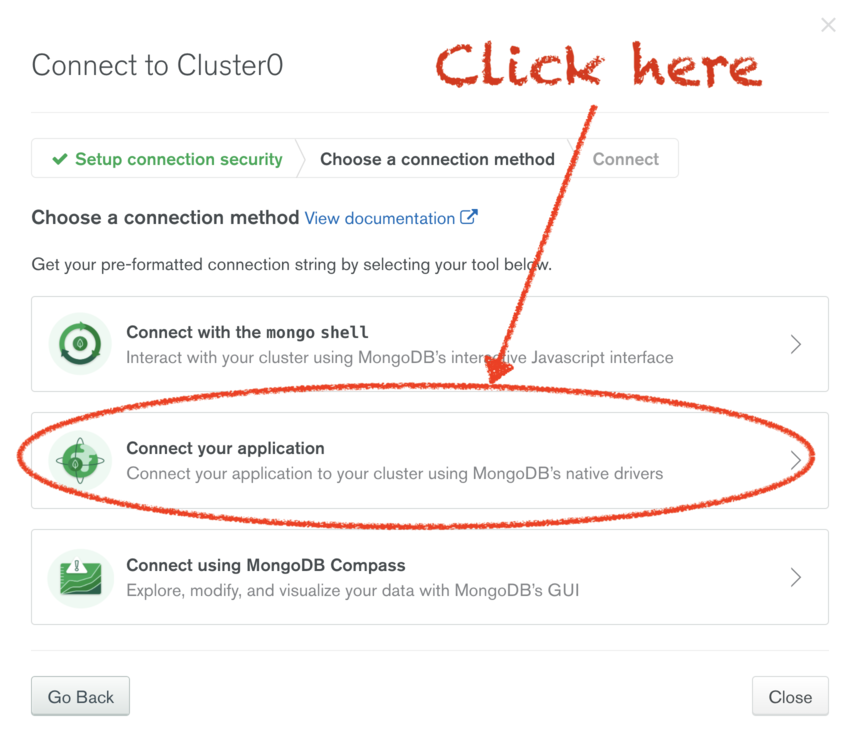
Step 9: Obtain the URI string for connection
The next screen is accessed either by clicking the “Choose a Connection Method” button at the end of the previous step, or by selecting “Cluster” from the left menu bar, and clicking the connect button.
You are offered three choices for how to connect. Choose “Connect your Application”.
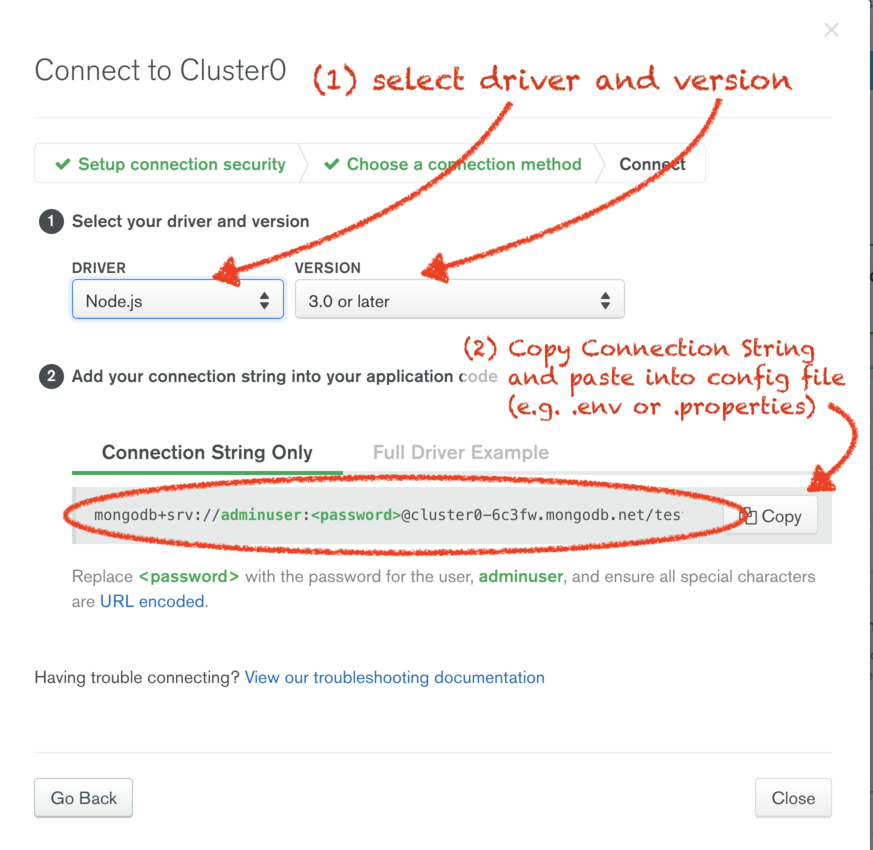
The next step depends on the tech stack of your application; you need to select the “Driver” and “Version”.
- For the next.js stack for CS48 in S20, the correct values are “node” and “3.0 or higher”.
- For other tech stacks, make the selection that mostly closely fits your situation
You are then shown a connection string. Copy this string, and then close the window.
You’ll now want to paste this string into the correct place in the configuration for
your app. Here is an example of pasting this string into the value of MONGODB_URI in the
file .env for next.js app:

Note, however, that part of this string still has the text <password>.
- You must replace this, including the angle brackets (
<>) with the actual password - To obtain the actual password, we’ll go to a screen where we can edit the database user and change its password.
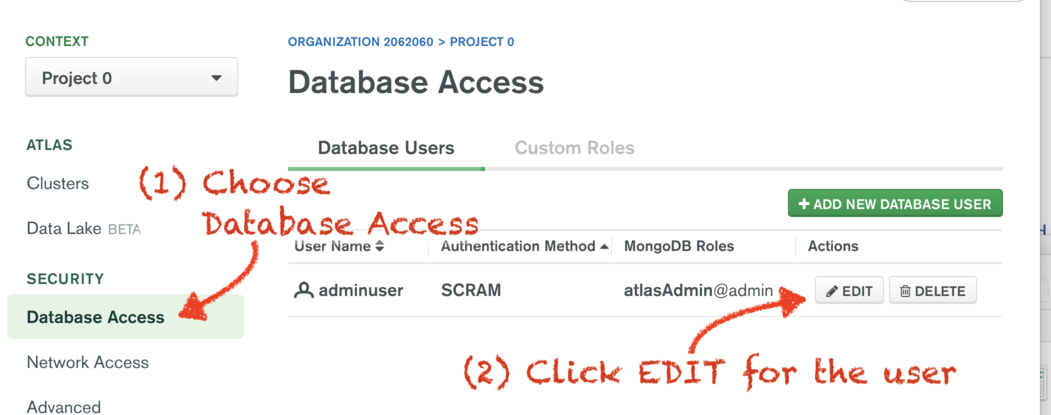
Step 10: Obtaining (changing) the DB User Password
In this step, we replace the placeholder <password> with a correct
password for the user (e.g. adminuser). It is not possible to look up the current
password, but it is possible to generate a new one.
To do this, select “Database Access” from the side menu, and then the “Edit” for the appropriate user, as shown here:
This brings you to the following page, where you can click to edit the password:
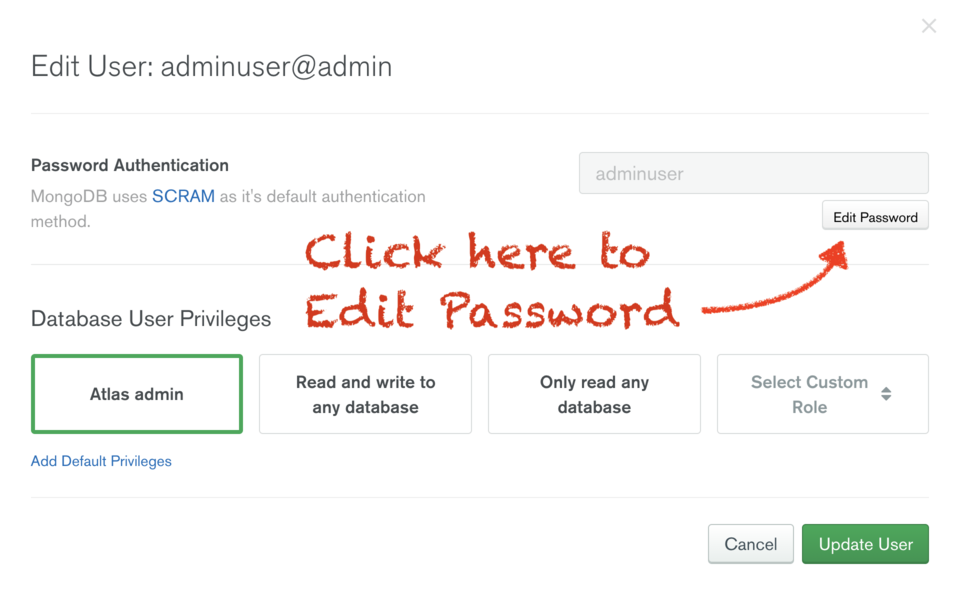
On this page, click to generate a new password, and copy it before you close the page.
You may want to keep the page open until the new password is safely stored in the configuration file where you need to put it.
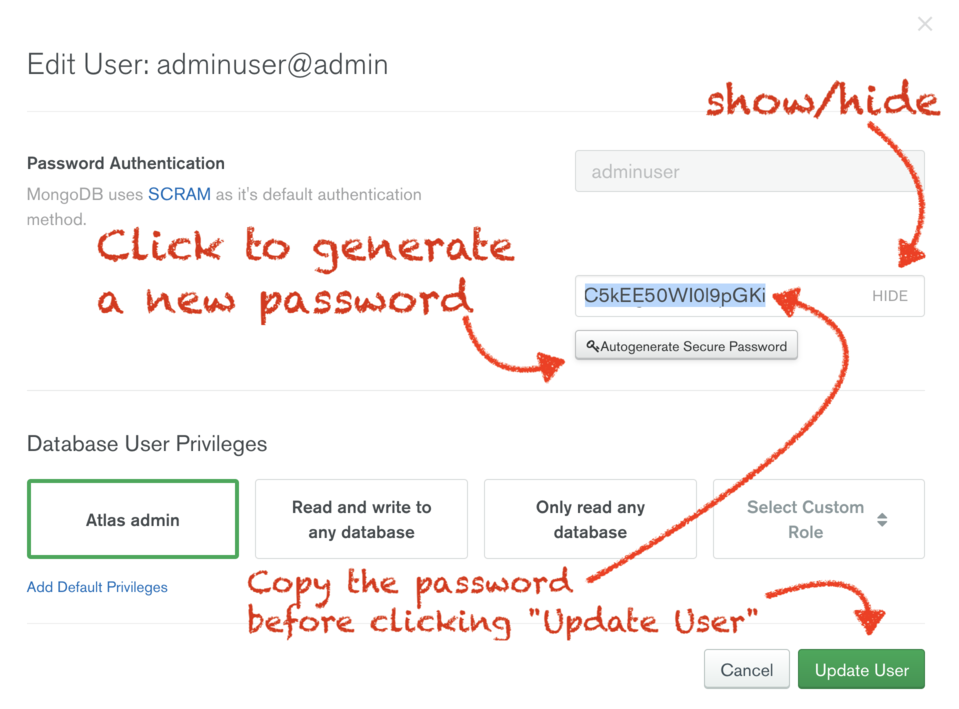
Paste in the password into the appropriate configuration file, replacing <password>, including
the angle brackets (<>). Be sure to then click “Update User” rather than “Cancel”,
so that the change in the password takes effect.

Step 11: Test your application
Congratulations: you are done. You should now be able to test your application with MongoDB.
For more specific information, consult the specific MongoDB documentation for your tech stack.
Related topics:
- MongoDB: Cloud Atlas Setup—Setting up MongoDB Cloud Atlas (for new users)
- MongoDB: Cloud Atlas Sharing—Sharing a Cloud Atlas Setup
- MongoDB: Mlab—A cloud provider of MongoDB databases with a free tier
- MongoDB: NextJS Guide—How database operations in NextJS differ from examples in standard node
- MongoDB: NextJS Setup—Configurig your NextJS app for MongoDB
- MongoDB: Spring Properties—How to set properties for connecting to MongoDB when using Spring